

This post may contain affiliate links. Please see my disclosure policy
Air Fryer Tacos – skip the store bought crispy shells and make your own in the air fryer. Super easy and so much better!
I will admit it, I love a good crispy taco. I know they aren’t authentic, and I know if you are from Mexico you probably cringe at the boxed shells sold in the grocery store. But I grew up with them, and they are definitely an American staple. Then I started making them in the air fryer with plain corn tortillas, and I haven’t gone back. You get that crunchy, golden shell, but you can still actually taste the real corn tortilla.
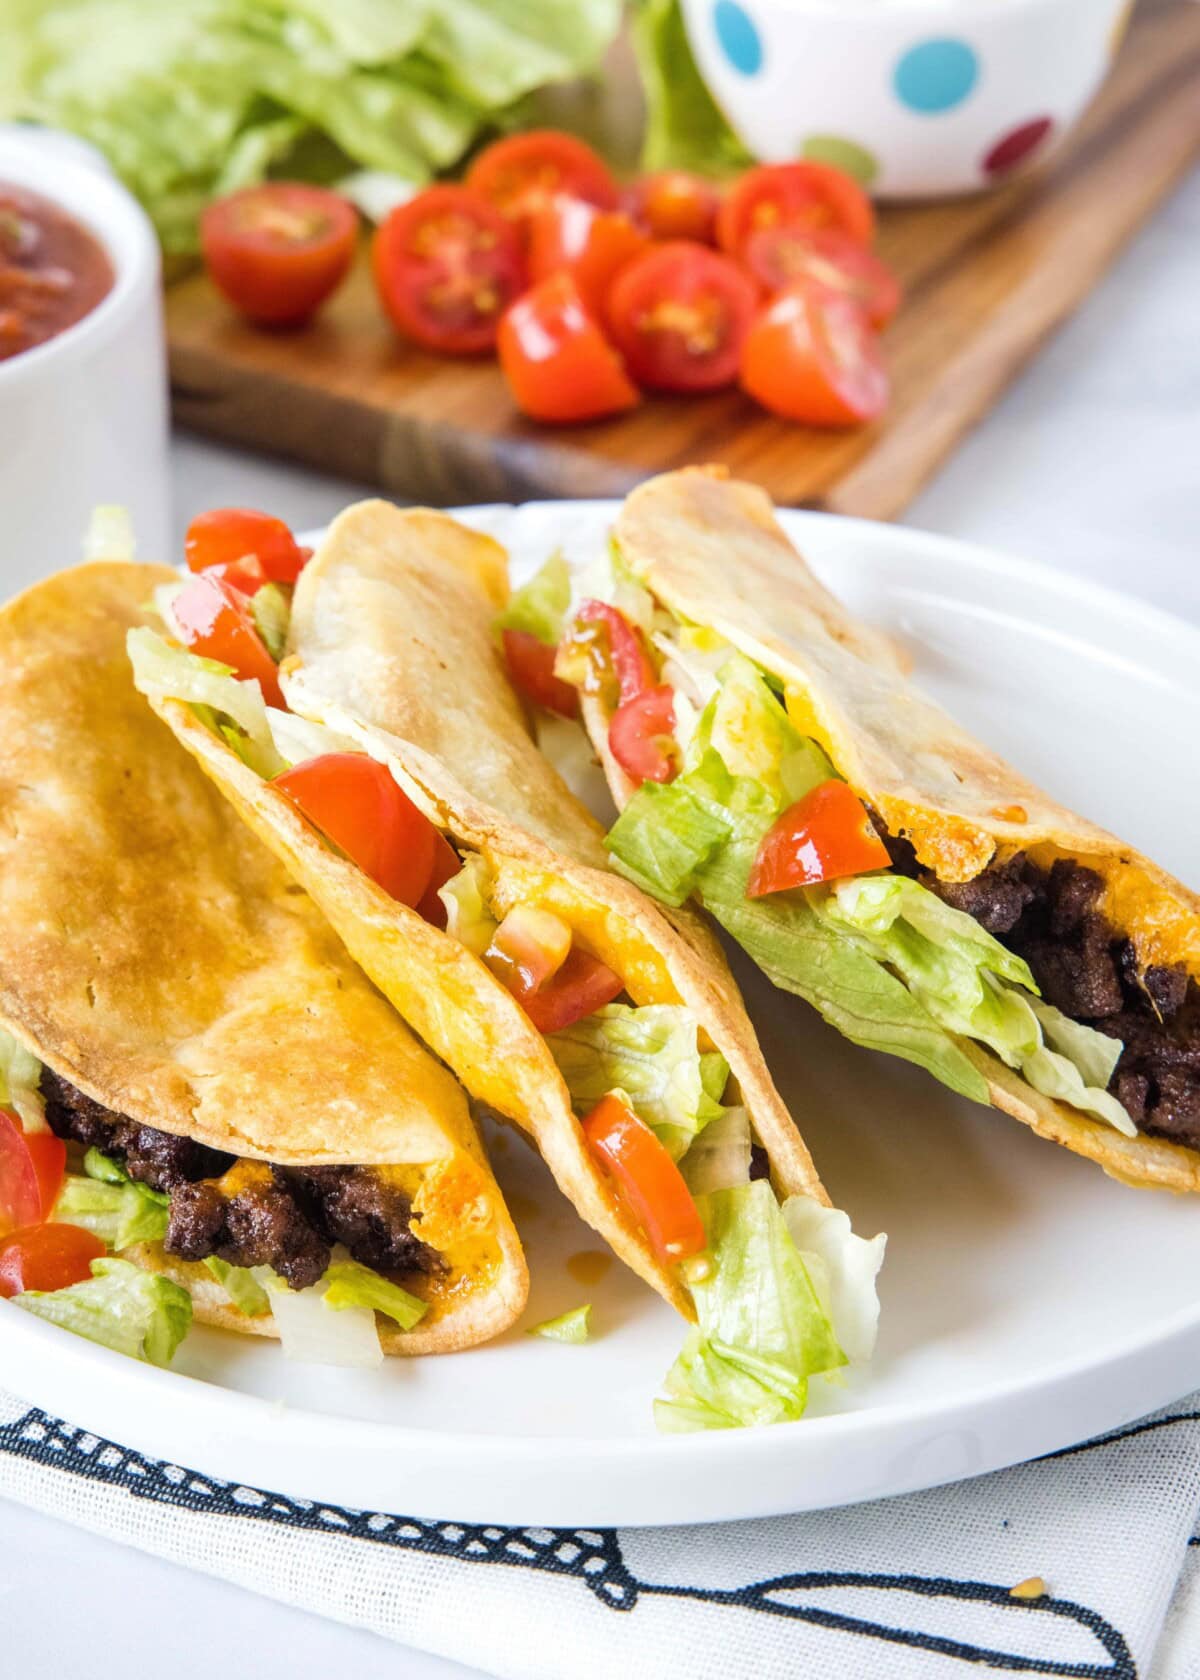
The best part is that you fill them before they go in, so the cheese melts right into the meat and everything gets crispy together. Classic seasoned ground beef and cheddar is our go-to, but you can fill these with chicken, beans, or whatever you have on hand. It’s an easy 30 minute dinner that makes taco night feel a little more special.
Erin’s Notes
- Crispy without frying – A light brush of olive oil and the air fryer gives you a crunchy shell with no pot of hot oil.
- Real corn tortilla flavor – Way better than boxed shells that taste like cardboard.
- No broken shells – You fill the tortillas while they’re soft, so they don’t shatter on the first bite.
- Quick weeknight dinner – Ready in about 30 minutes from start to finish.
- Totally customizable – Swap the filling and toppings to suit everyone at the table.
What You’ll Need
Be sure to scroll to the bottom of the post for the FULL PRINTABLE recipe card.
- Corn Tortillas – I use regular white corn tortillas, the standard size you find at the store. Taco-size flour tortillas work too.
- Ground Beef – Drain it well after browning so the shells stay crisp instead of soggy.
- Taco Seasoning – A store-bought packet or my Homemade Taco Seasoning. You’ll add 2/3 cup water with it.
- Cheddar Cheese – Shredded cheddar melts into the meat and helps hold everything together.
- Olive Oil – Brushed on the outside of the tacos so they turn golden and crispy.
You really can fill these with whatever you like. If you want to do vegetarian you could fill them with beans and cheese. Or you can use my favorite Instant Pot Salsa Chicken to fill them with. Whatever you have and like for your taco filling is what you can use. Just use the recipe as a guide for cooking the taco part.

How To Make Air Fryer Tacos
Be sure to scroll to the bottom of the post for the FULL PRINTABLE recipe card.
- Cook the taco meat. Heat a large skillet over high heat. Add the ground beef, breaking it apart, and cook for 5-6 minutes until browned. Drain the grease, then stir in the taco seasoning and 2/3 cup water. Simmer for a few minutes until the liquid is absorbed, then remove from the heat.
- Warm the tortillas. Wrap the corn tortillas in a towel and microwave for about 1 minute, until they are very warm and soft. This keeps them from cracking when you fold them.
- Fill and fold. Working in batches, fill 4 tortillas with ground beef and cheese. Fold each one in half to form a taco.
- Brush with oil. Brush the outside of each taco with olive oil.
- Arrange in the basket. Place the tacos in the air fryer basket in a single layer. Use toothpicks to hold them closed, or set an Instant Pot trivet on top to keep them from opening up.
- Air fry. Cook at 400ºF for 8 minutes, flipping halfway through. Once you flip, you can usually remove the toothpicks.
- Repeat and top. Remove the cooked tacos and repeat with the remaining tortillas. Add your favorite toppings and serve right away.

Best Taco Toppings
You really can go crazy here, use as much or as little as you like!
- Shredded Lettuce
- Diced Tomatoes
- Black Olives
- Avocado
- Restaurant Style Salsa
- Guacamole
- Sour Cream
- Jalapeno
- Roasted Corn Salsa

Recipe Tips
- Get the tortillas really warm. Cold corn tortillas crack when you fold them. If they start cracking while you work, warm them again for a few seconds.
- Hold them closed. The air fryer fan can flip the tacos open. Toothpicks or an Instant Pot trivet on top keep them shut until the shells set.
- Don’t overfill. A moderate amount of filling makes the tacos easier to close and helps them crisp evenly.
- Drain the meat well. Extra grease or liquid makes the shells soggy, so let the taco meat simmer until the liquid is absorbed.
- Single layer only. Crowding the basket means less air flow and less crispy shells. Cook in batches.
- Keep an eye on the last batch. Air fryers vary and a preheated basket cooks a little faster, so check later batches a minute or two early.
Variations
- Chicken – Fill them with shredded chicken. My Instant Pot Salsa Chicken is a favorite.
- Ground Turkey – Use ground turkey in place of the beef with the same seasoning. (For a soft taco version, try my Ground Turkey Tacos.)
- Beans and Cheese – For a vegetarian version, fill them with Homemade Refried Beans or black beans and cheese.
- Flour Tortillas – Taco-size flour tortillas work great. Warm them so they’re pliable, and they crisp up in the air fryer just like corn.

What Goes With Tacos
Storage & Reheating
To store: Let leftover tacos cool completely, then store them in an airtight container in the refrigerator for up to 4 days.
To reheat: Warm them in the air fryer or oven at 300ºF for about 5 minutes, until heated through. This keeps the shells crispy, while the microwave will make them soft.
More Mexican Dinner Recipes
- Chipotle Chicken Bowls
- Mexican Pizza
- Wet Burrito
- Air Fryer Chimichanga
- Chile Relleno Casserole
- Potato Tacos

Air Fryer Tacos
Ingredients
- 1 pound ground beef
- 1 package taco seasoning
- 2/3 cup water
- 1 1/2 cups shredded cheddar cheese
- 8 corn tortillas (standard size), or taco size flour tortillas
- 1 Tablespoon olive oil
Taco Toppings
Instructions
- Heat a large skillet over high heat. Add ground beef, breaking apart, and cook for 5-6 minutes until browned. Drain any grease away. Add taco seasoning and water called for on the packet. Simmer for a few minutes until the liquid is absorbed. Remove from heat.1 pound ground beef, 1 package taco seasoning
- Wrap corn tortillas in a towel and microwave for 1 minute.8 corn tortillas (standard size)
- Working in batches, fill 4 of the tortillas with ground beef and cheese.1 1/2 cups shredded cheddar cheese
- Fold in half to form a taco and brush the outside with olive oil.1 Tablespoon olive oil
- Place in the air fryer basket in a single layer. You can use a toothpick to hold them closed, or if you have an Instant Pot, the trivet works well to place on top to stop them from opening up.Cook at 400º F for 8 minutes, flipping half way.
- Remove the cooked ones and repeat with the rest of the ingredients.
- Top the cooked tacos with whatever your favorite taco toppings are.Lettuce, Tomatoes, Black Olives, Sour Cream
Notes
- If your tacos open up from the circulating air, use toothpicks to hold them closed during the first half of cooking. After you flip, you should be able to remove them.
- Taco-size flour tortillas work in place of corn. Warm them the same way before filling.
- Leftovers keep in an airtight container in the fridge for up to 4 days. Reheat in the air fryer or oven at 300ºF for about 5 minutes.
Nutrition
Nutrition information is automatically calculated, so should only be used as an approximation.





So crunchy and yummy. I’ll never go back to store bought.
This is a dinner idea that my whole family will love! It looks amazingly delicious!
What size corn tortillas do you use?
Just the standard ones, all of my stores only have one size – I think it is like 5 inches?
Could you use flour tortillas?
Yes you can, the time might be just slightly different
We loved these! I used flour tortillas which took a tad longer… but totally worth it!
I don’t see pictures of the recipe with corn tortillas. Did the flour just work better?
I am not sure what you mean, all of the pictures are with corn tortillas, it is the way I make it 99% of the time. You can use whatever you want, they both work. I just like corn better, so it is what I use.
@Erin S, I agree with Cam. The pictures look like flour tortillas.
Ok, but it isn’t. The picture in the air fryer of them shows a cracked on, that looks like a corn tortilla. I don’t know why it matters, and why you would question the person who made them and photographed them. I have also said you can use whatever tortilla you like, so what I used doesn’t even matter.
@Carm, There are multiple types of corn. The tortillas you see are made with white corn, not yellow.
Can you flour tortillas or is it just not the same?
You can absolutely use flour, either works. It is just a matter of preference. The hard shell tacos at the store are corn, which is what I was trying to make this be a swap for. But they will still be crispy as flour tortillas.
Love this and these recipes are all great! Thanks
This recipe made nothing but a mess.
1. It’s a royal pain when trying to transfer the tacos to the air fryer. everything falls out (or wants to) which makes a mess in the basket. Also, I got small burns while trying to refill the shells
2. Didn’t see the “Note” until too late, which was 1/2 way through the 8 minutes. This was good and bad. GOOD- because it was at about the 3.5 minute mark. BAD_ because the tops did indeed fly up do to the fan.
3. Opening the basket at the 3.5 minute mark not only found the shell tops had blown up but they were fairly burnt in that position as well. The 8 minute cook time is WAY too much time as well as the 400 temperature!.
When getting the taco out of the HOT basket, one has to be very careful. Some were stuck so I had to use tongs along with a fork to free a couple of them.
So on my second group turned out much better. I turned the temp down the 360, placed tooth picks around the tops, and set timer for 4 minutes. I turned them after 2mins and that did it.
Next time I’m going to try to place just the shells in at 360 for 3.5-4 minutes and then stuff them. Or I’m going back to the usual way.
WOW! My dream recipe! I’ve always wished people would add the ingredients in the actual instructions so that I don’t have to scroll back and forth! I wish every site did this. Thank you!!!