This post may contain affiliate links. Please see my disclosure policy
Just 4 ingredients to make the sweet, fruity, and delicious Fruity Pebbles Bars. A fun twist on a classic for a whole new treat.
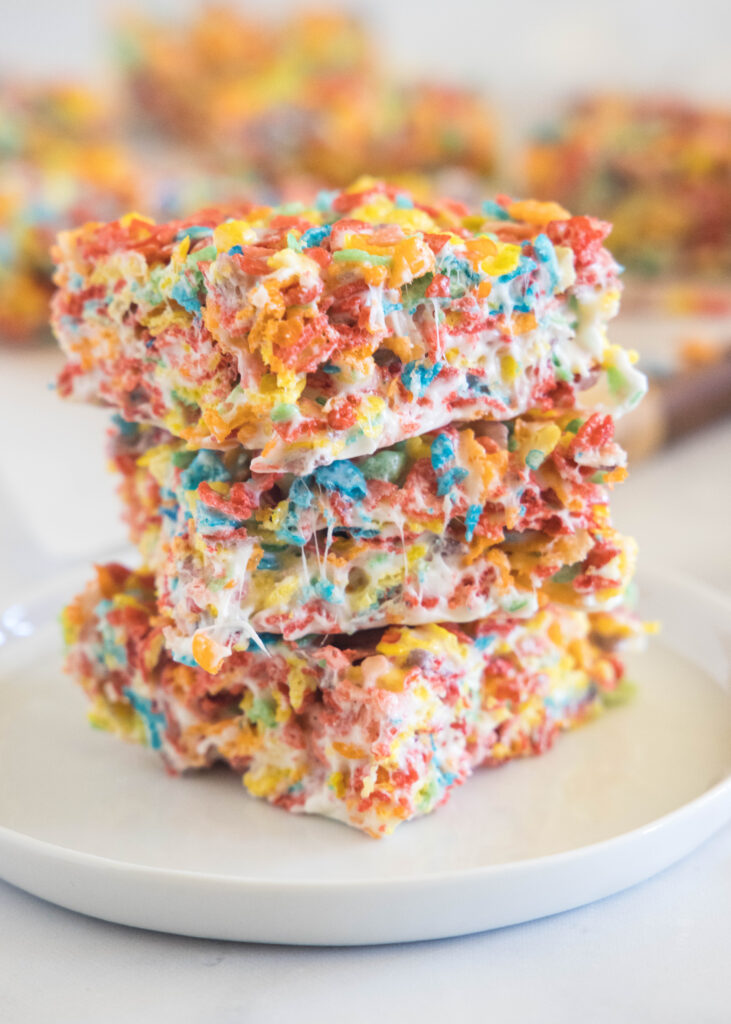
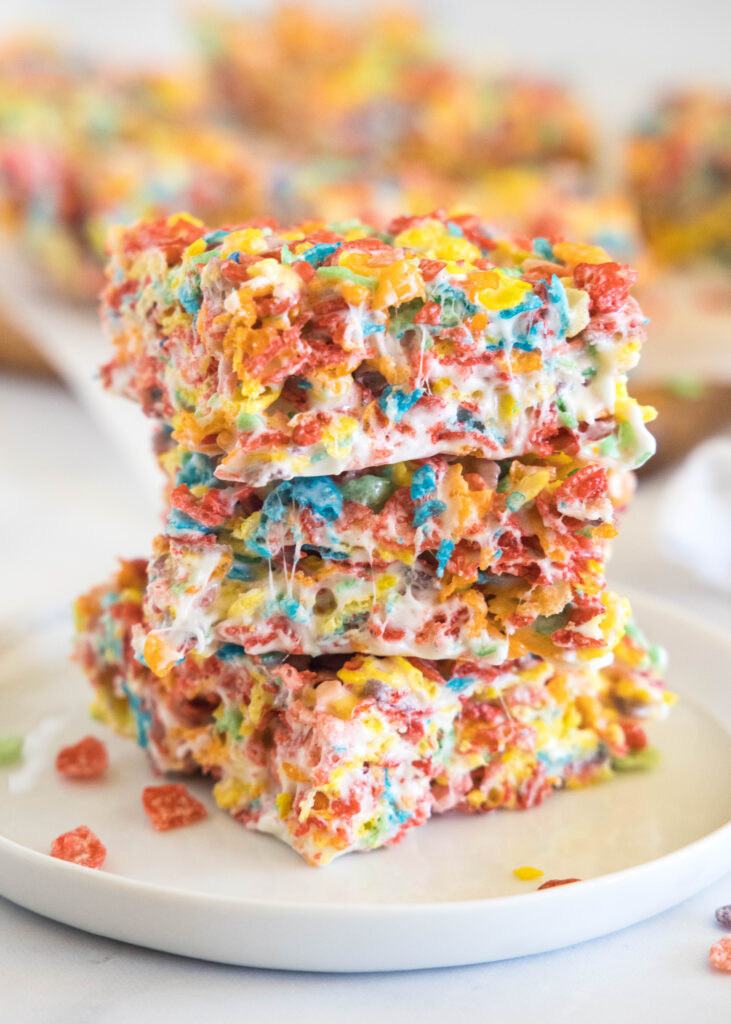
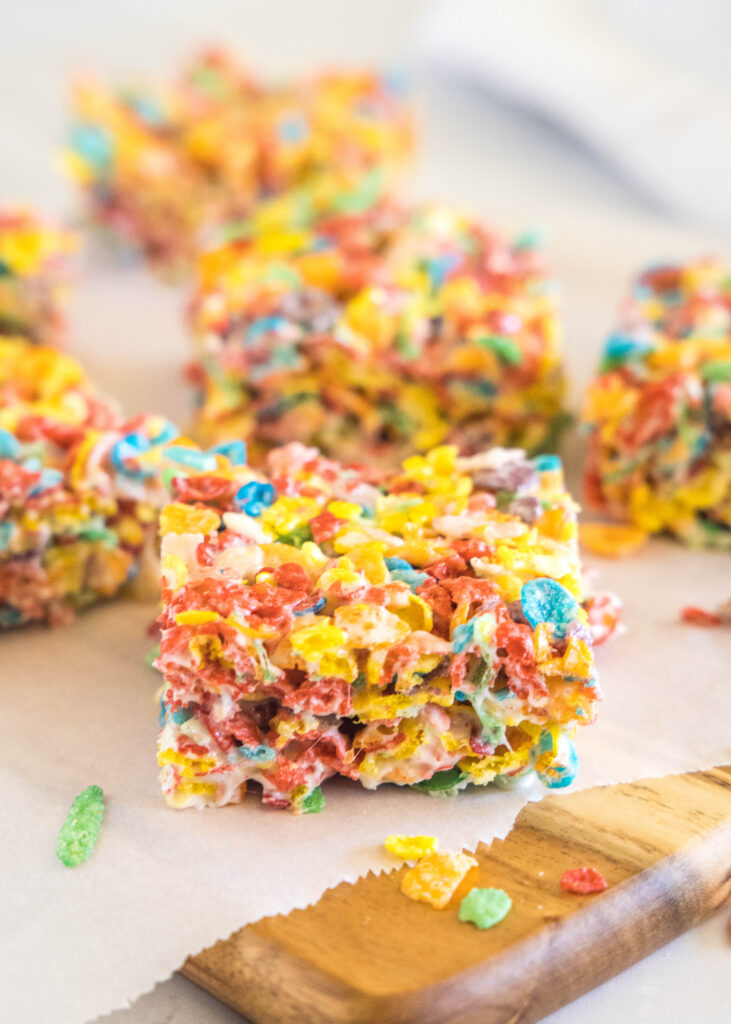
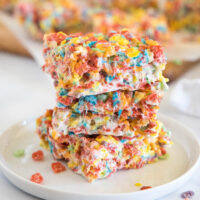
Did you have a favorite cereal as a kid? Mine was Golden Grahams, but my brothers’ was Fruity Pebbles. We weren’t allowed to have them very often at all, so when we did they were even more special! And let me tell you, if you even remotely like Fruity Pebbles cereal, you are going to go crazy for these bars. They are just like a Rice Krispie Treat, but they use Fruity Pebbles for an epic twist. Not only are they colorful and fun to serve, they will disappear faster than anything once people try them!
Why You’ll Love These Fruity Pebbles Bars
- Fun – the rainbow of colors just makes these fun for both kids and adults to enjoy!
- Easy – you only need 4 ingredients that you can find at any grocery store, so they are super easy to throw together any day of the week.
- Fast – no baking involved, just melting marshmallows, means these are ready in about 10 minutes.
- Delicious – if you like a gooey rice krispie treat, these are a whole new level. The fruity cereal just ups the game and makes them something extra tasty.
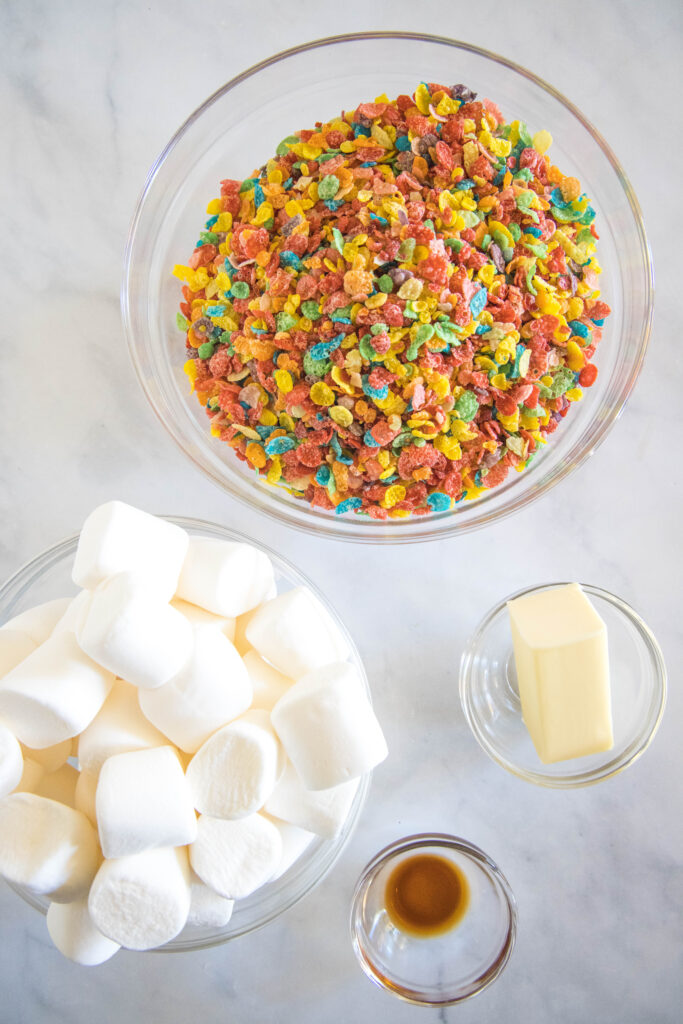
What You’ll Need
- Fruity Pebbles Cereal
- Marshmallows
- Butter
- Vanilla Extract
How To Make Fruity Pebbles Bars
- Melt Marshmallows. In a large bowl add the marshmallows together with cubes of butter. Microwave for 1 minute, remove and stir well. For most microwaves this will be enough to melt the butter, if yours isn’t melted enough return for an additional 15 seconds. Add in the vanilla and mix until completely blended.
- Add Cereal. Pour in the cereal and mix until evenly coated and well blended.
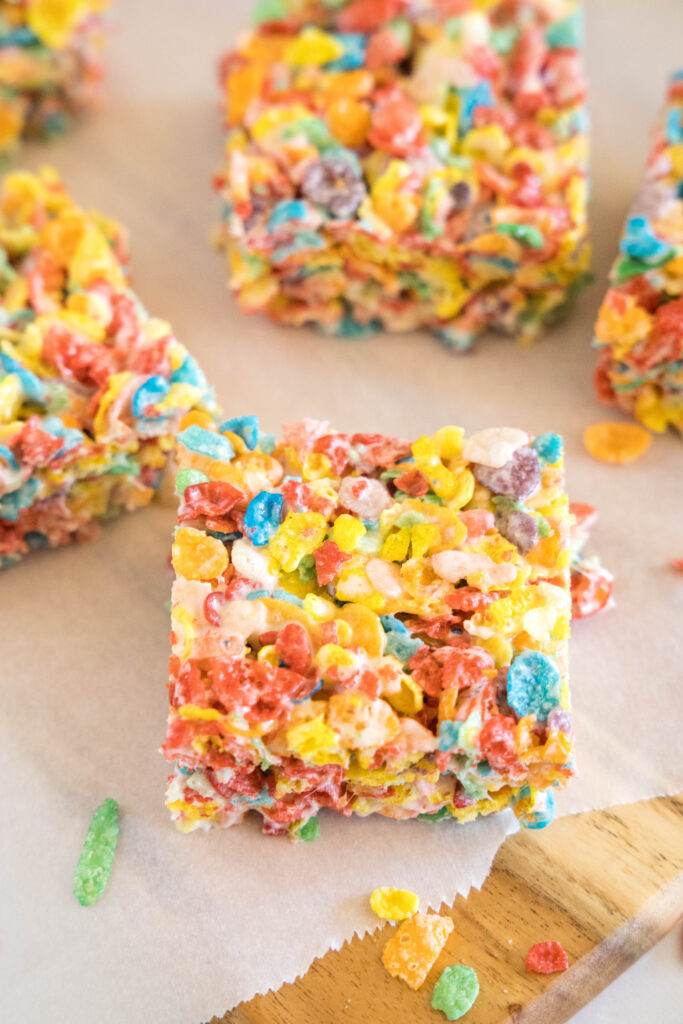
- Let Set Up. Spread the cereal mixture into a 13×9 inch pan and use a spatula to press into an even layer. You can spray a spatula with non-stick spray if it is sticking. Let the treats set up for a about an hour before slicing to serve.
Recipe Tips & Suggestions
- I used a 13×9 inch square pan for these bars, but you really could use an 9 inch square or even an 8-inch square pan. It really depends on how thick or thin you want your bars.
- Full size marshmallows were what I used for this recipe, but you can use mini marshmallows if that is what you have. They will just melt faster, so make sure to cut your butter into smaller cubes, or use the stovetop so everything melts well.
- Use fresh cereal. I know this sounds obvious, but sometimes you think mixing with with sugar will cover the stale taste and will work. Trust me, it doesn’t. Buy a new box.
- To press the bars evenly into the pan, you can spray your spatula with non-stick spray, or you can wet your hands. Just shake off the excess so they are just damp. Once the mixture starts to stick, get them wet again.
How To Store
Cover the pan of Fruity Pebbles Bars with foil or plastic wrap and they will last at room temperature for 3-4 days. They are not something you are going to want to freeze. But you can make them the day ahead and slice when you are ready to serve.
Bars on their last leg? Heat a bar in the microwave for 5-10 seconds just to soften it. Softening the marshmallow will make them gooey and they will last just a tiny bit longer.
More Easy No Bake Dessert Recipes
- Peanut Butter Footballs
- Watermelon Rice Krispie Treats
- Oreo Lasagna
- Brownie Batter Dip
- Puppy Chow Bars
- Biscoff Rice Krispie Treats
Fruity Pebbles Bars
Ingredients
- 6 Tablespoons butter, cut into cubes
- 12 oz marshmallows
- 1 teaspoon vanilla extract
- 6 cups Fruity Pebbles cereal
Instructions
- Spray a 13×9 inch baking dish with non-stick spray. Set aside.
- Add marshmallows and butter to a large mixing bowl and place in the microwave for 60 seconds. Remove and stir until completely melted. If necessary heat again for 20 seconds.6 Tablespoons butter, 12 oz marshmallows
- Add vanilla extract and mix until fully combined.1 teaspoon vanilla extract
- Pour in cereal, mix until the cereal is evenly coated.6 cups Fruity Pebbles cereal
- Press mixture into a sprayed 13×9 inch baking dish. Wet your hands (shake off any excess water) and press mixture evenly into the pan, or spray your spatula with non-stick spray.
- Let bars set up for at least an hour before slicing.
Nutrition
Nutrition information is automatically calculated, so should only be used as an approximation.
I created a fun group on Facebook,and I would love for you to join us! It’s a place where you can share YOUR favorite recipes, ask questions, and see what’s new at Dinners, Dishes and Desserts (so that you never miss a new recipe)!
Be sure to follow me on Instagram and tag #dinnersdishes so I can see all the wonderful DINNERS, DISHES, AND DESSERTS recipes YOU make!
Be sure to follow me on my social media, so you never miss a post!
Facebook | Twitter | Pinterest | Instagram
.